Auto Relay
An Android app that forwards incoming messages to email or another number.
Configuring Gmail Email Forwarding
Email forwarding allows the app to send your messages to your inbox.
If you’re using the version from the Play Store, simply Sign In with your Google account in the app and you’re all set.
For Developers (Self-Building)
If you are building the app from source code, you’ll need to set up your own Google Cloud project to enable the Gmail API:
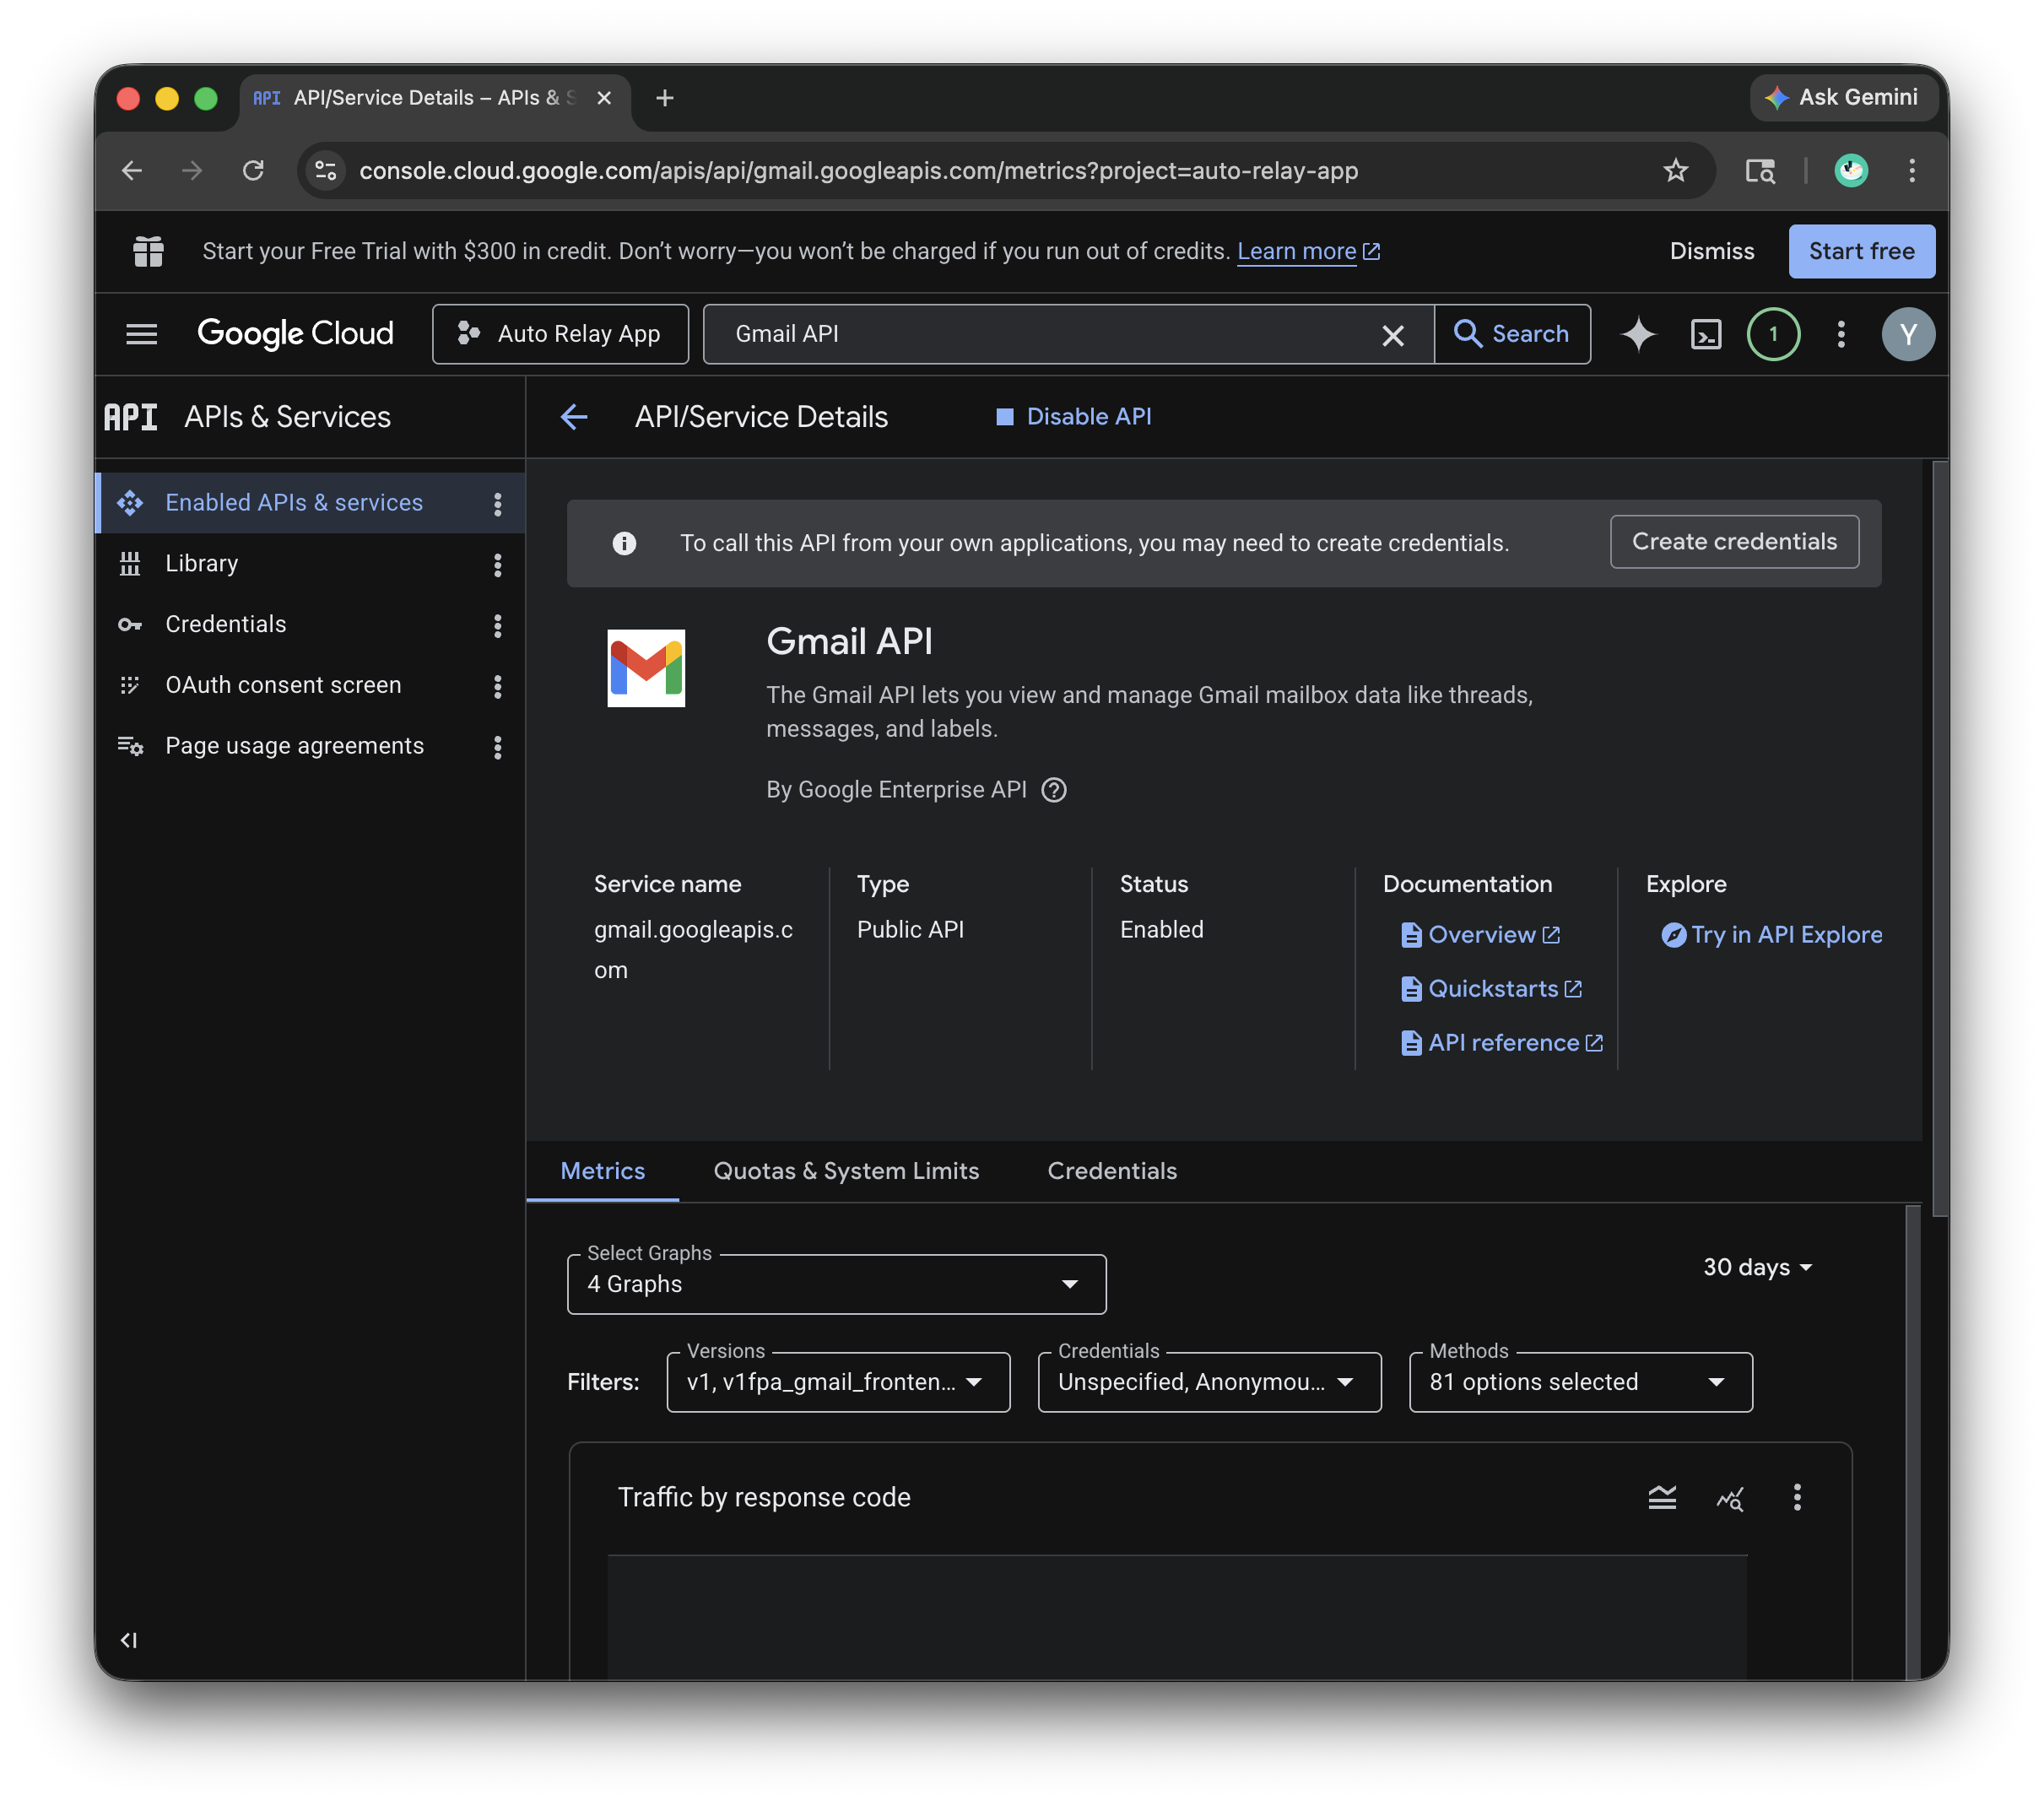
Step 1. Enable Gmail API
Go to the Google Cloud Console, create a project, and enable the Gmail API under APIs & Services.
Screenshot: Enable Gmail API
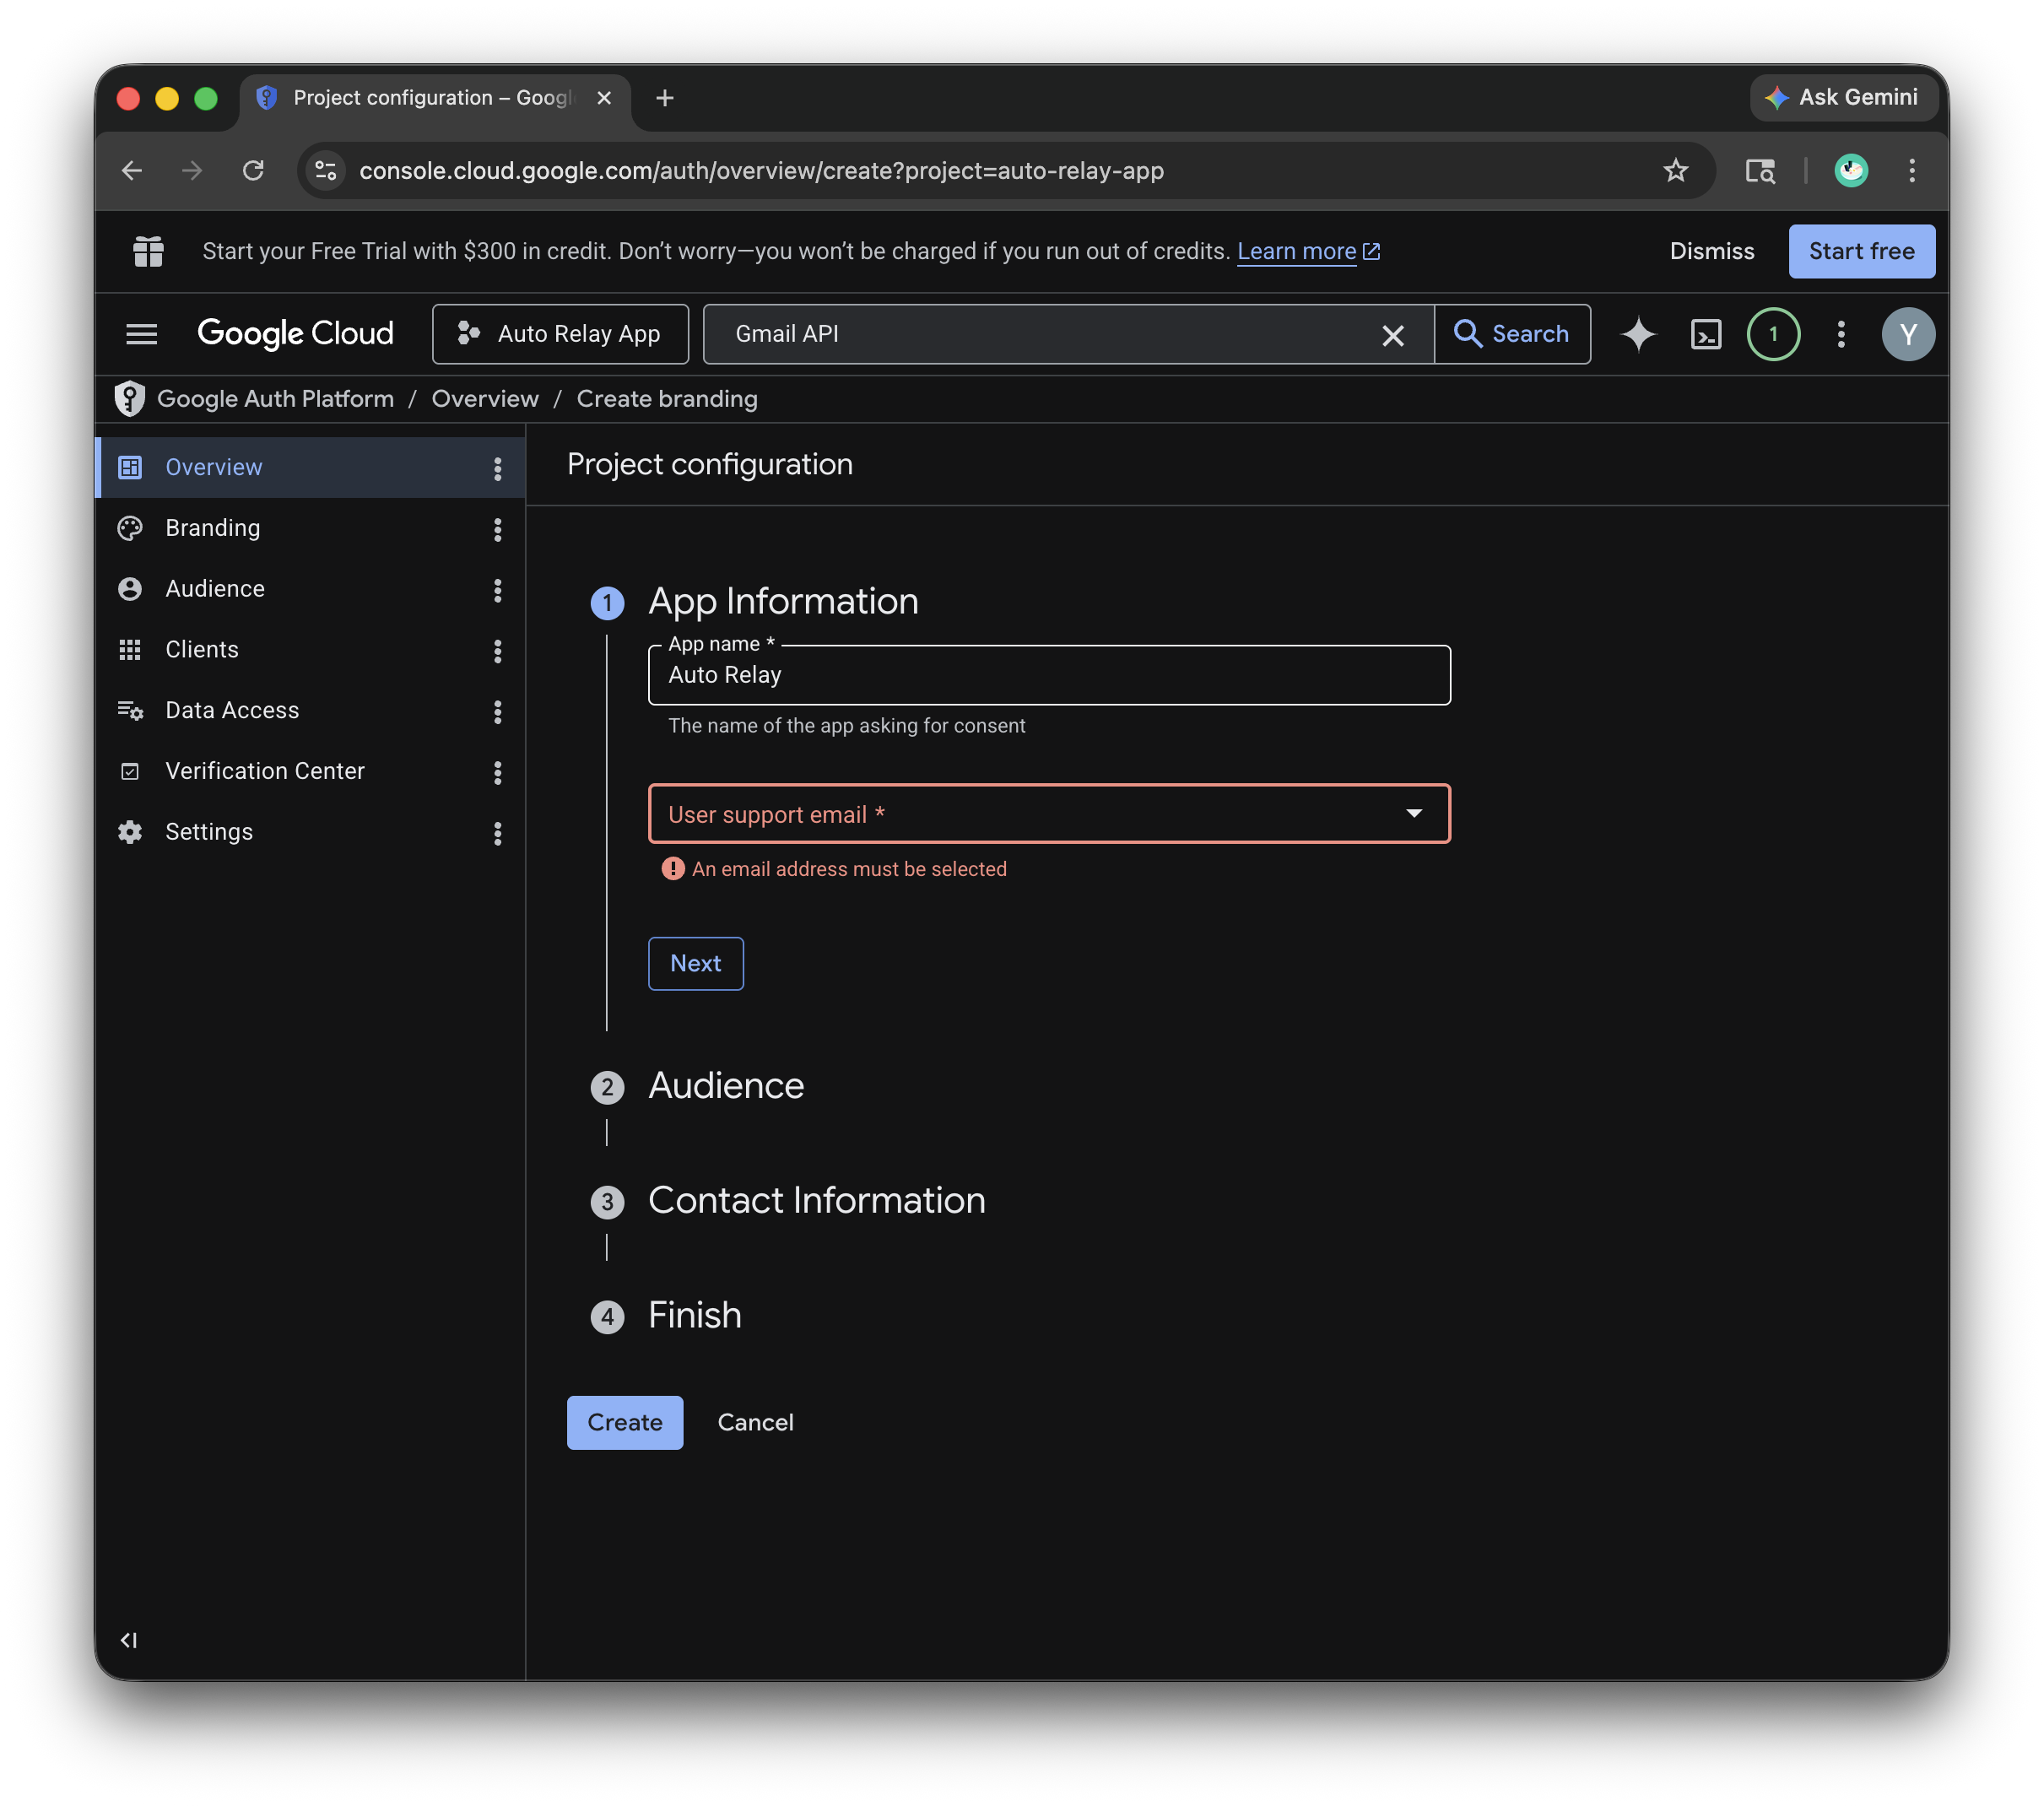
Step 2. Setup OAuth
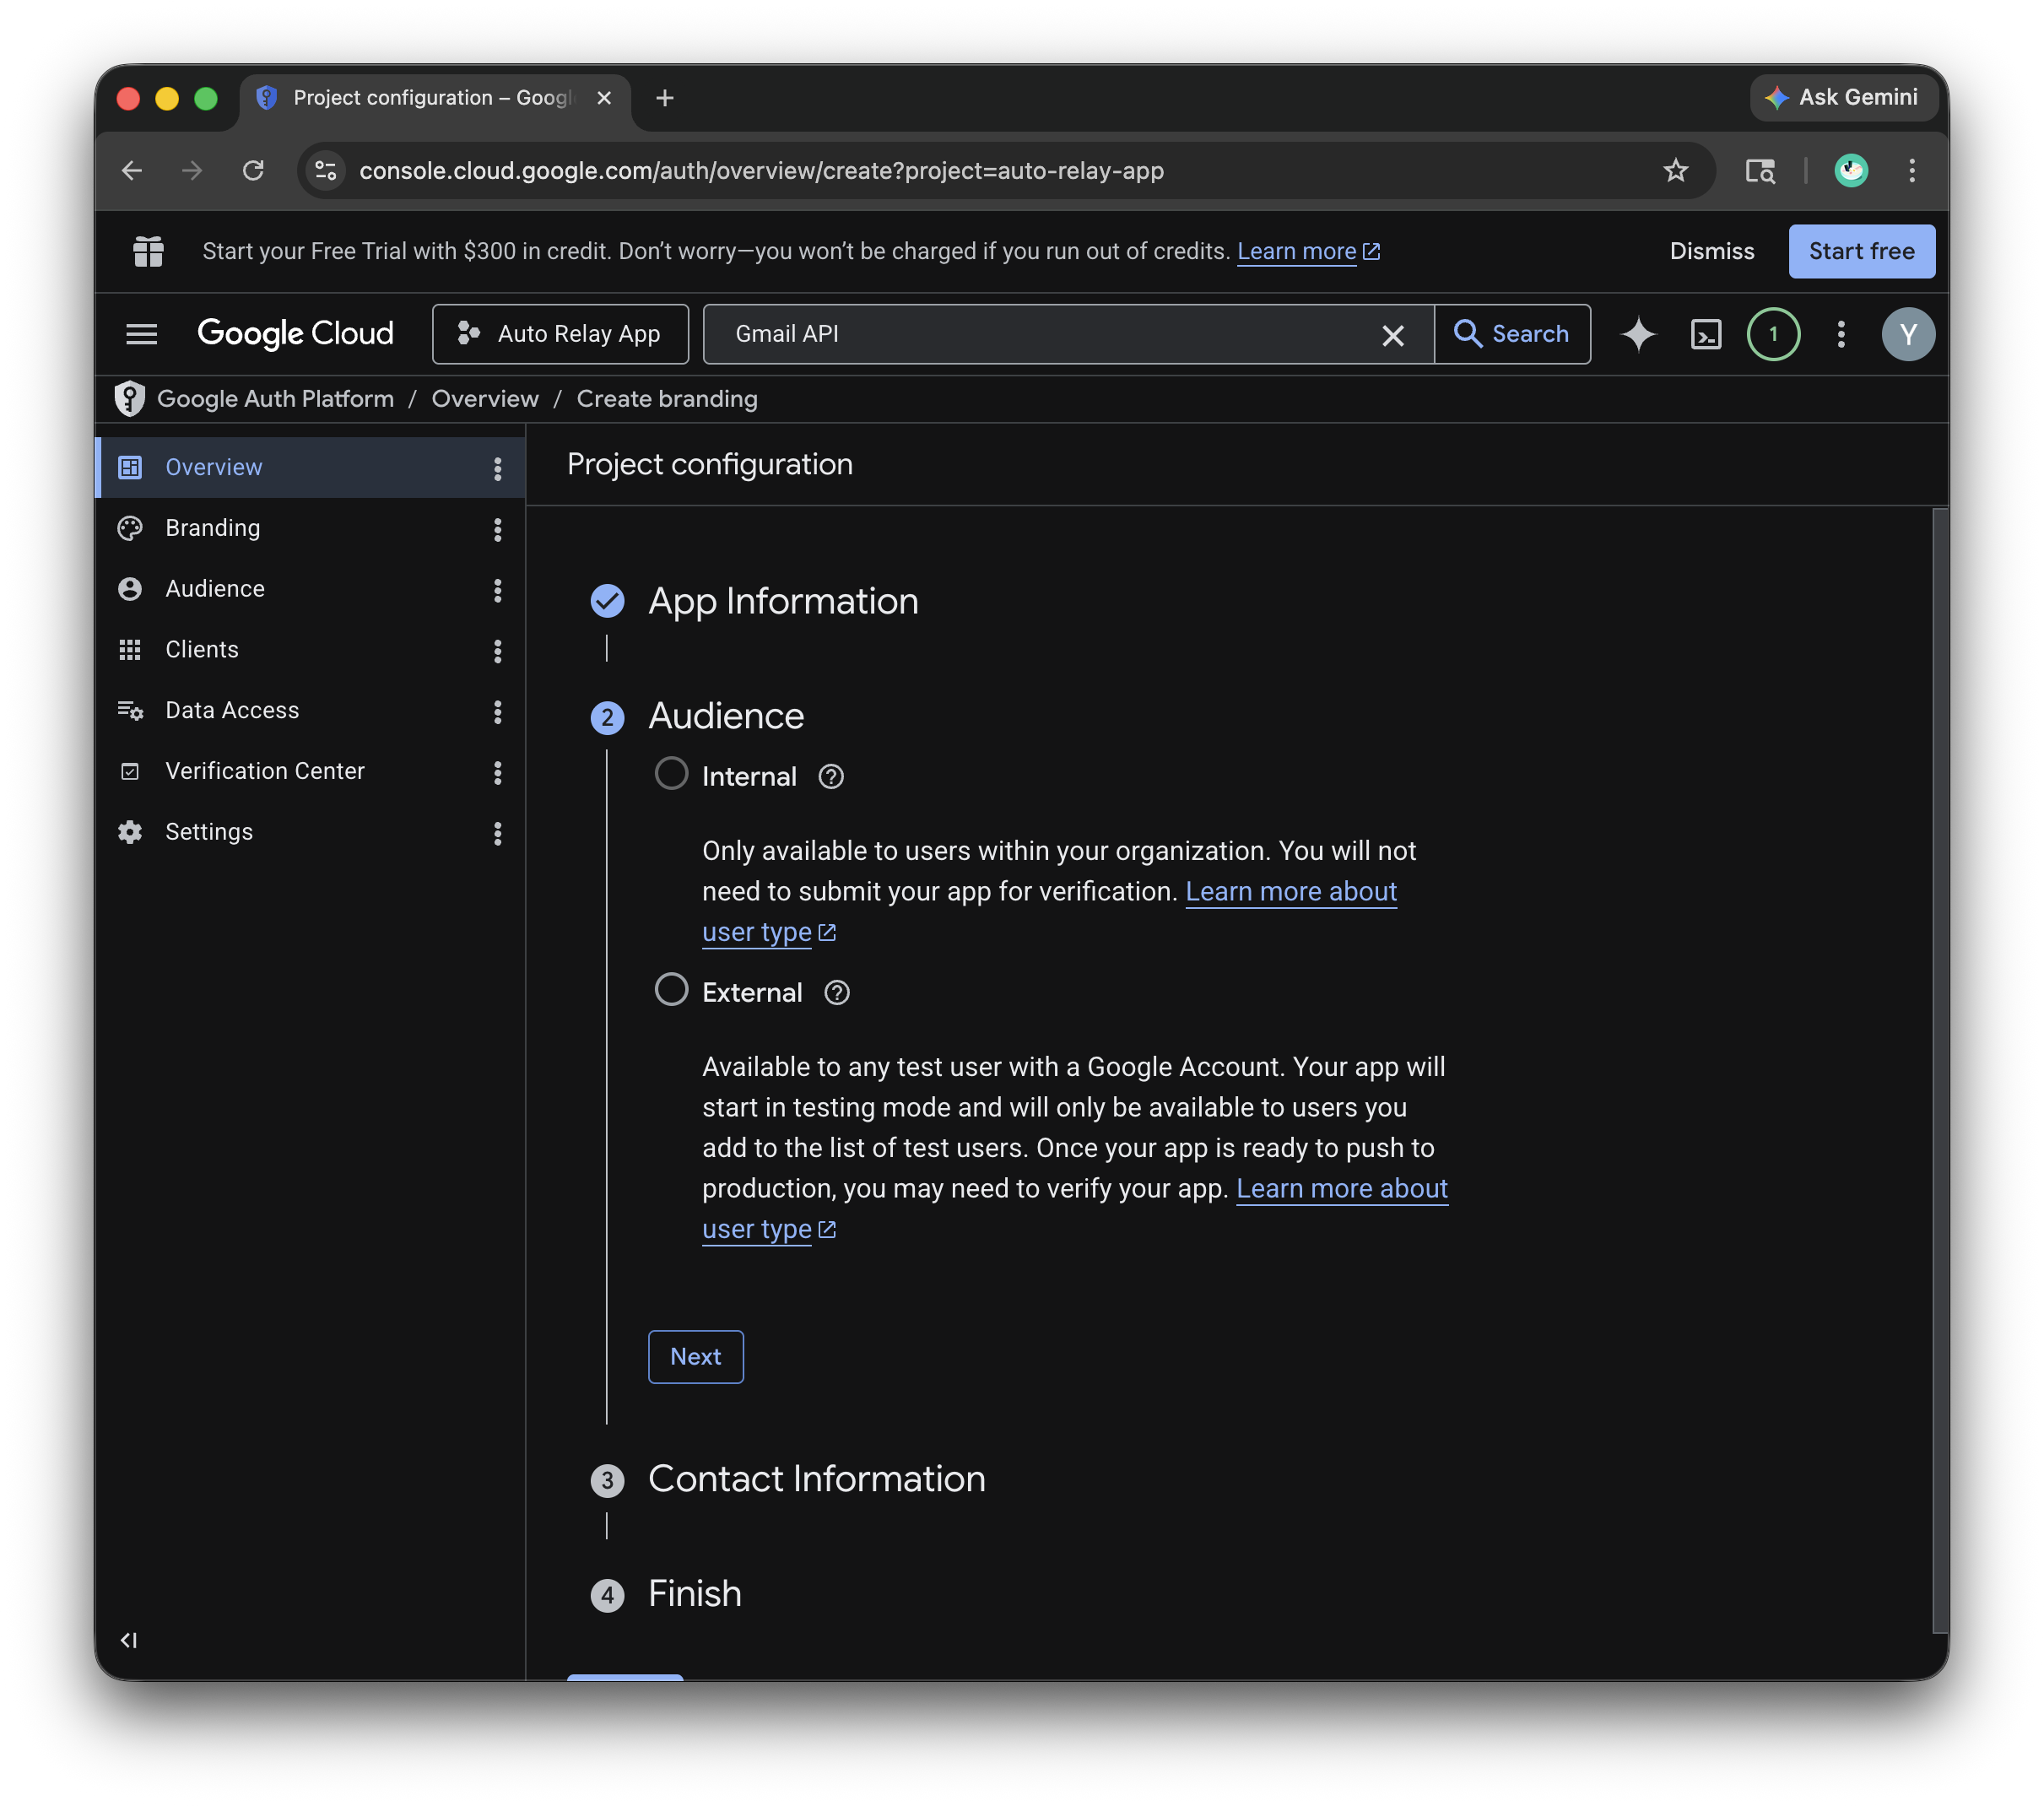
Configure the OAuth consent screen (set to “External”) and add your email as a “Test User.”
Screenshot: Enable Google Auth (Step 1)
Screenshot: Enable Google Auth (Step 2)
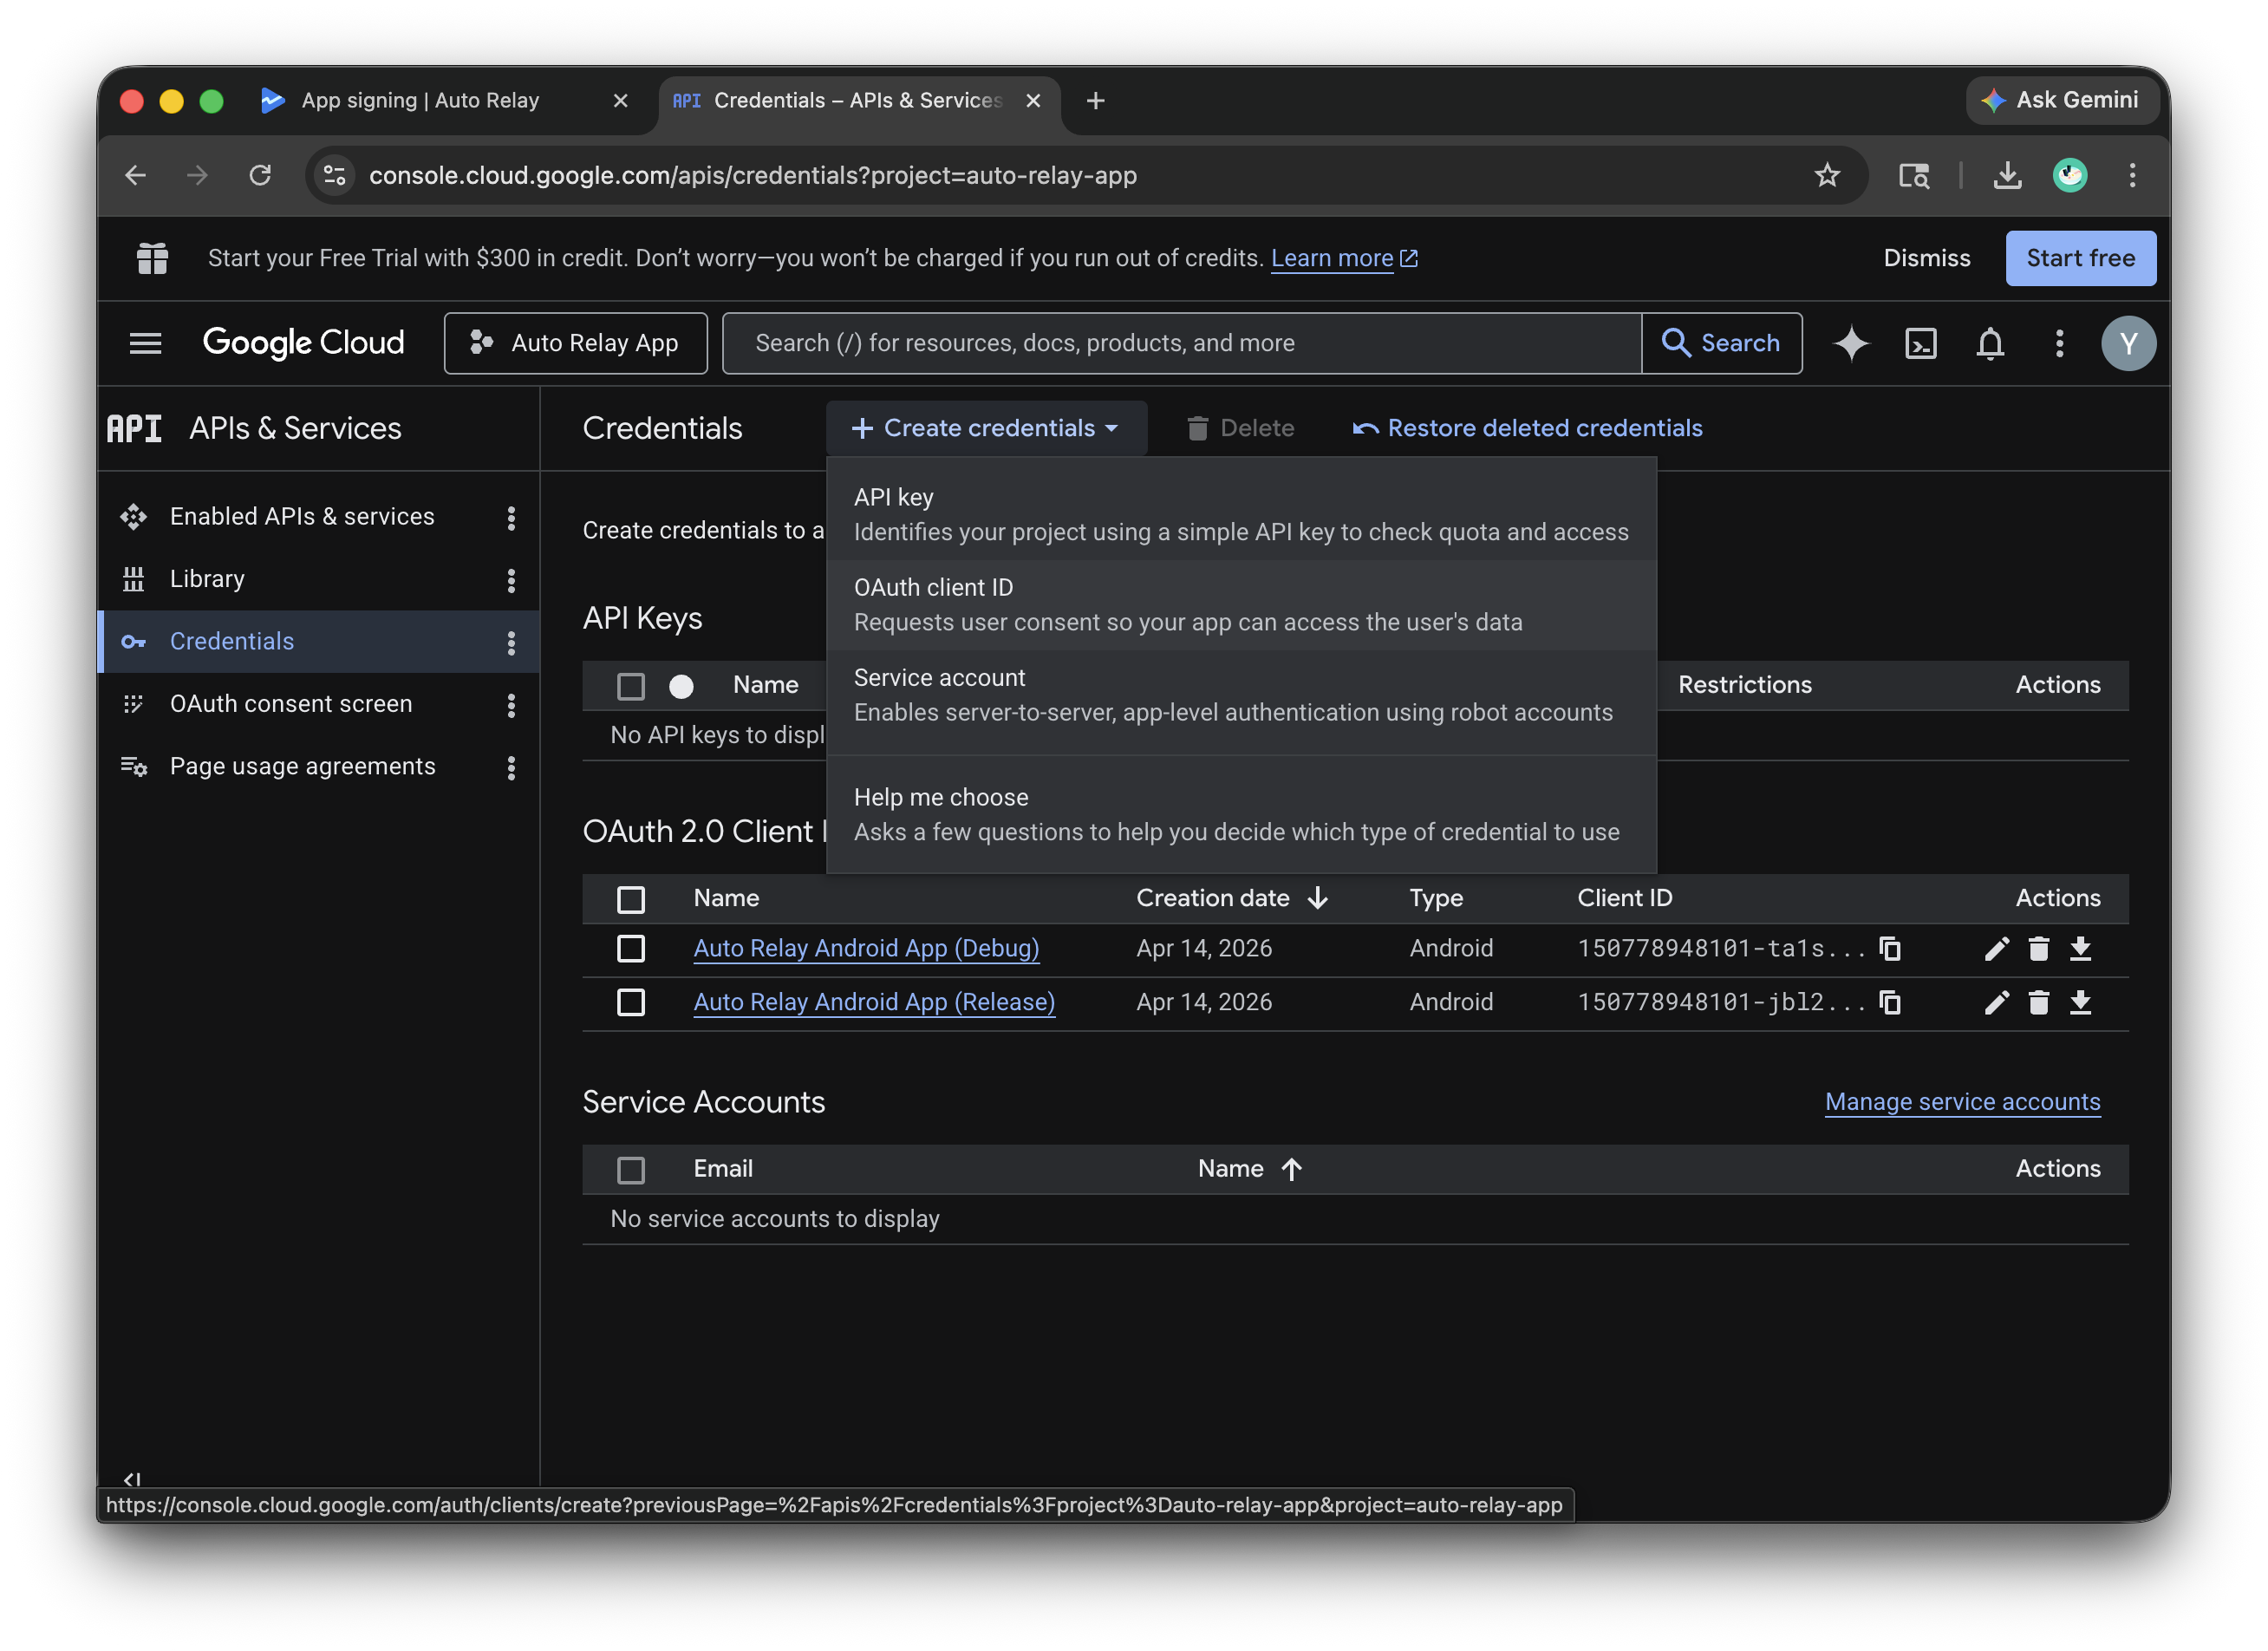
Step 3. Register your App
Create an Android OAuth client ID.
Use com.autorelay.app as the package name, or your own package name if
you’ve changed it.
For the SHA-1 fingerprint, you can use either of these methods:
(1) Recommended: Run ./configuring-gmail-email-forwarding/gradlew signingReport in the Android Studio Terminal and copy the SHA1 from the debug variant.
(2) Manual: Run keytool -keystore ~/.android/debug.keystore -list -v -storepass android and copy the SHA-1 code.
Screenshot: Google Auth Clients
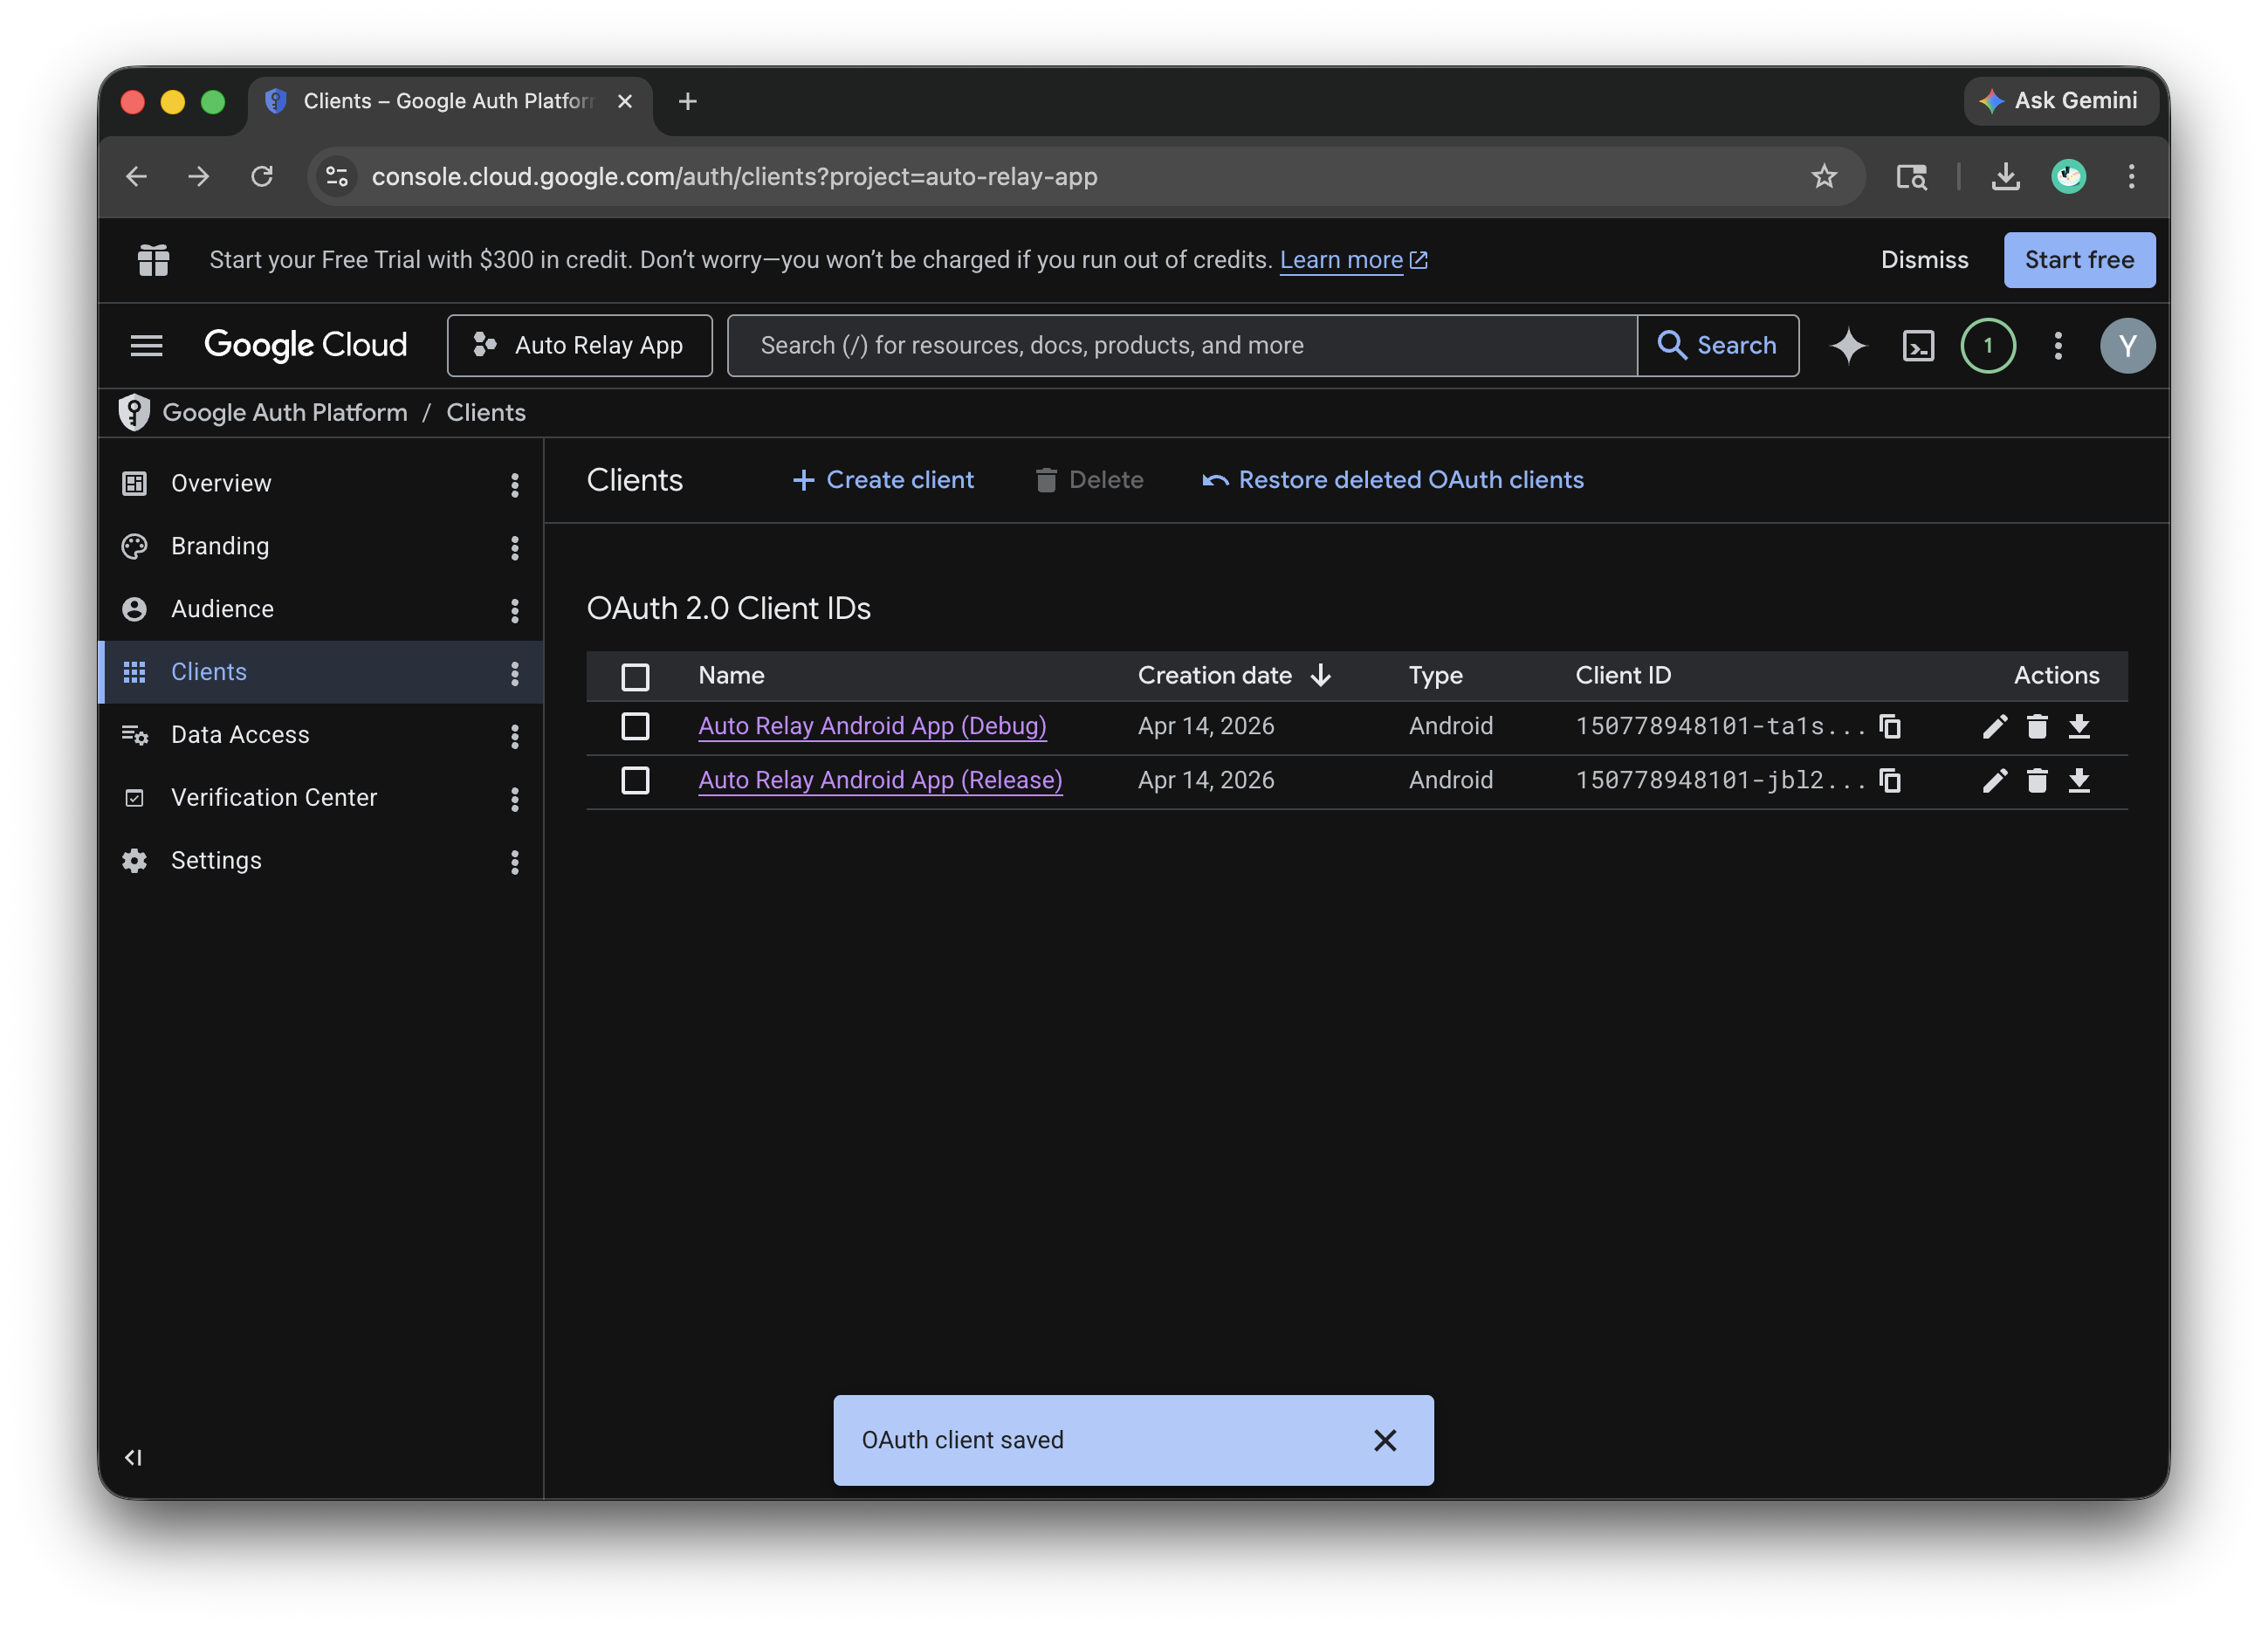
That’s it! No extra config files are needed — Google verifies your app automatically using your package name and certificate.
For Developers (Release Build)
If you publish to the Play Store with Play App Signing enabled, Google re-signs your app with a different key than your local debug or upload key. You need to register that key’s SHA-1 in your OAuth credential as well.
- Go to Play Console → Test and Release → App integrity
- Under “App signing key certificate”, copy the SHA-1 fingerprint
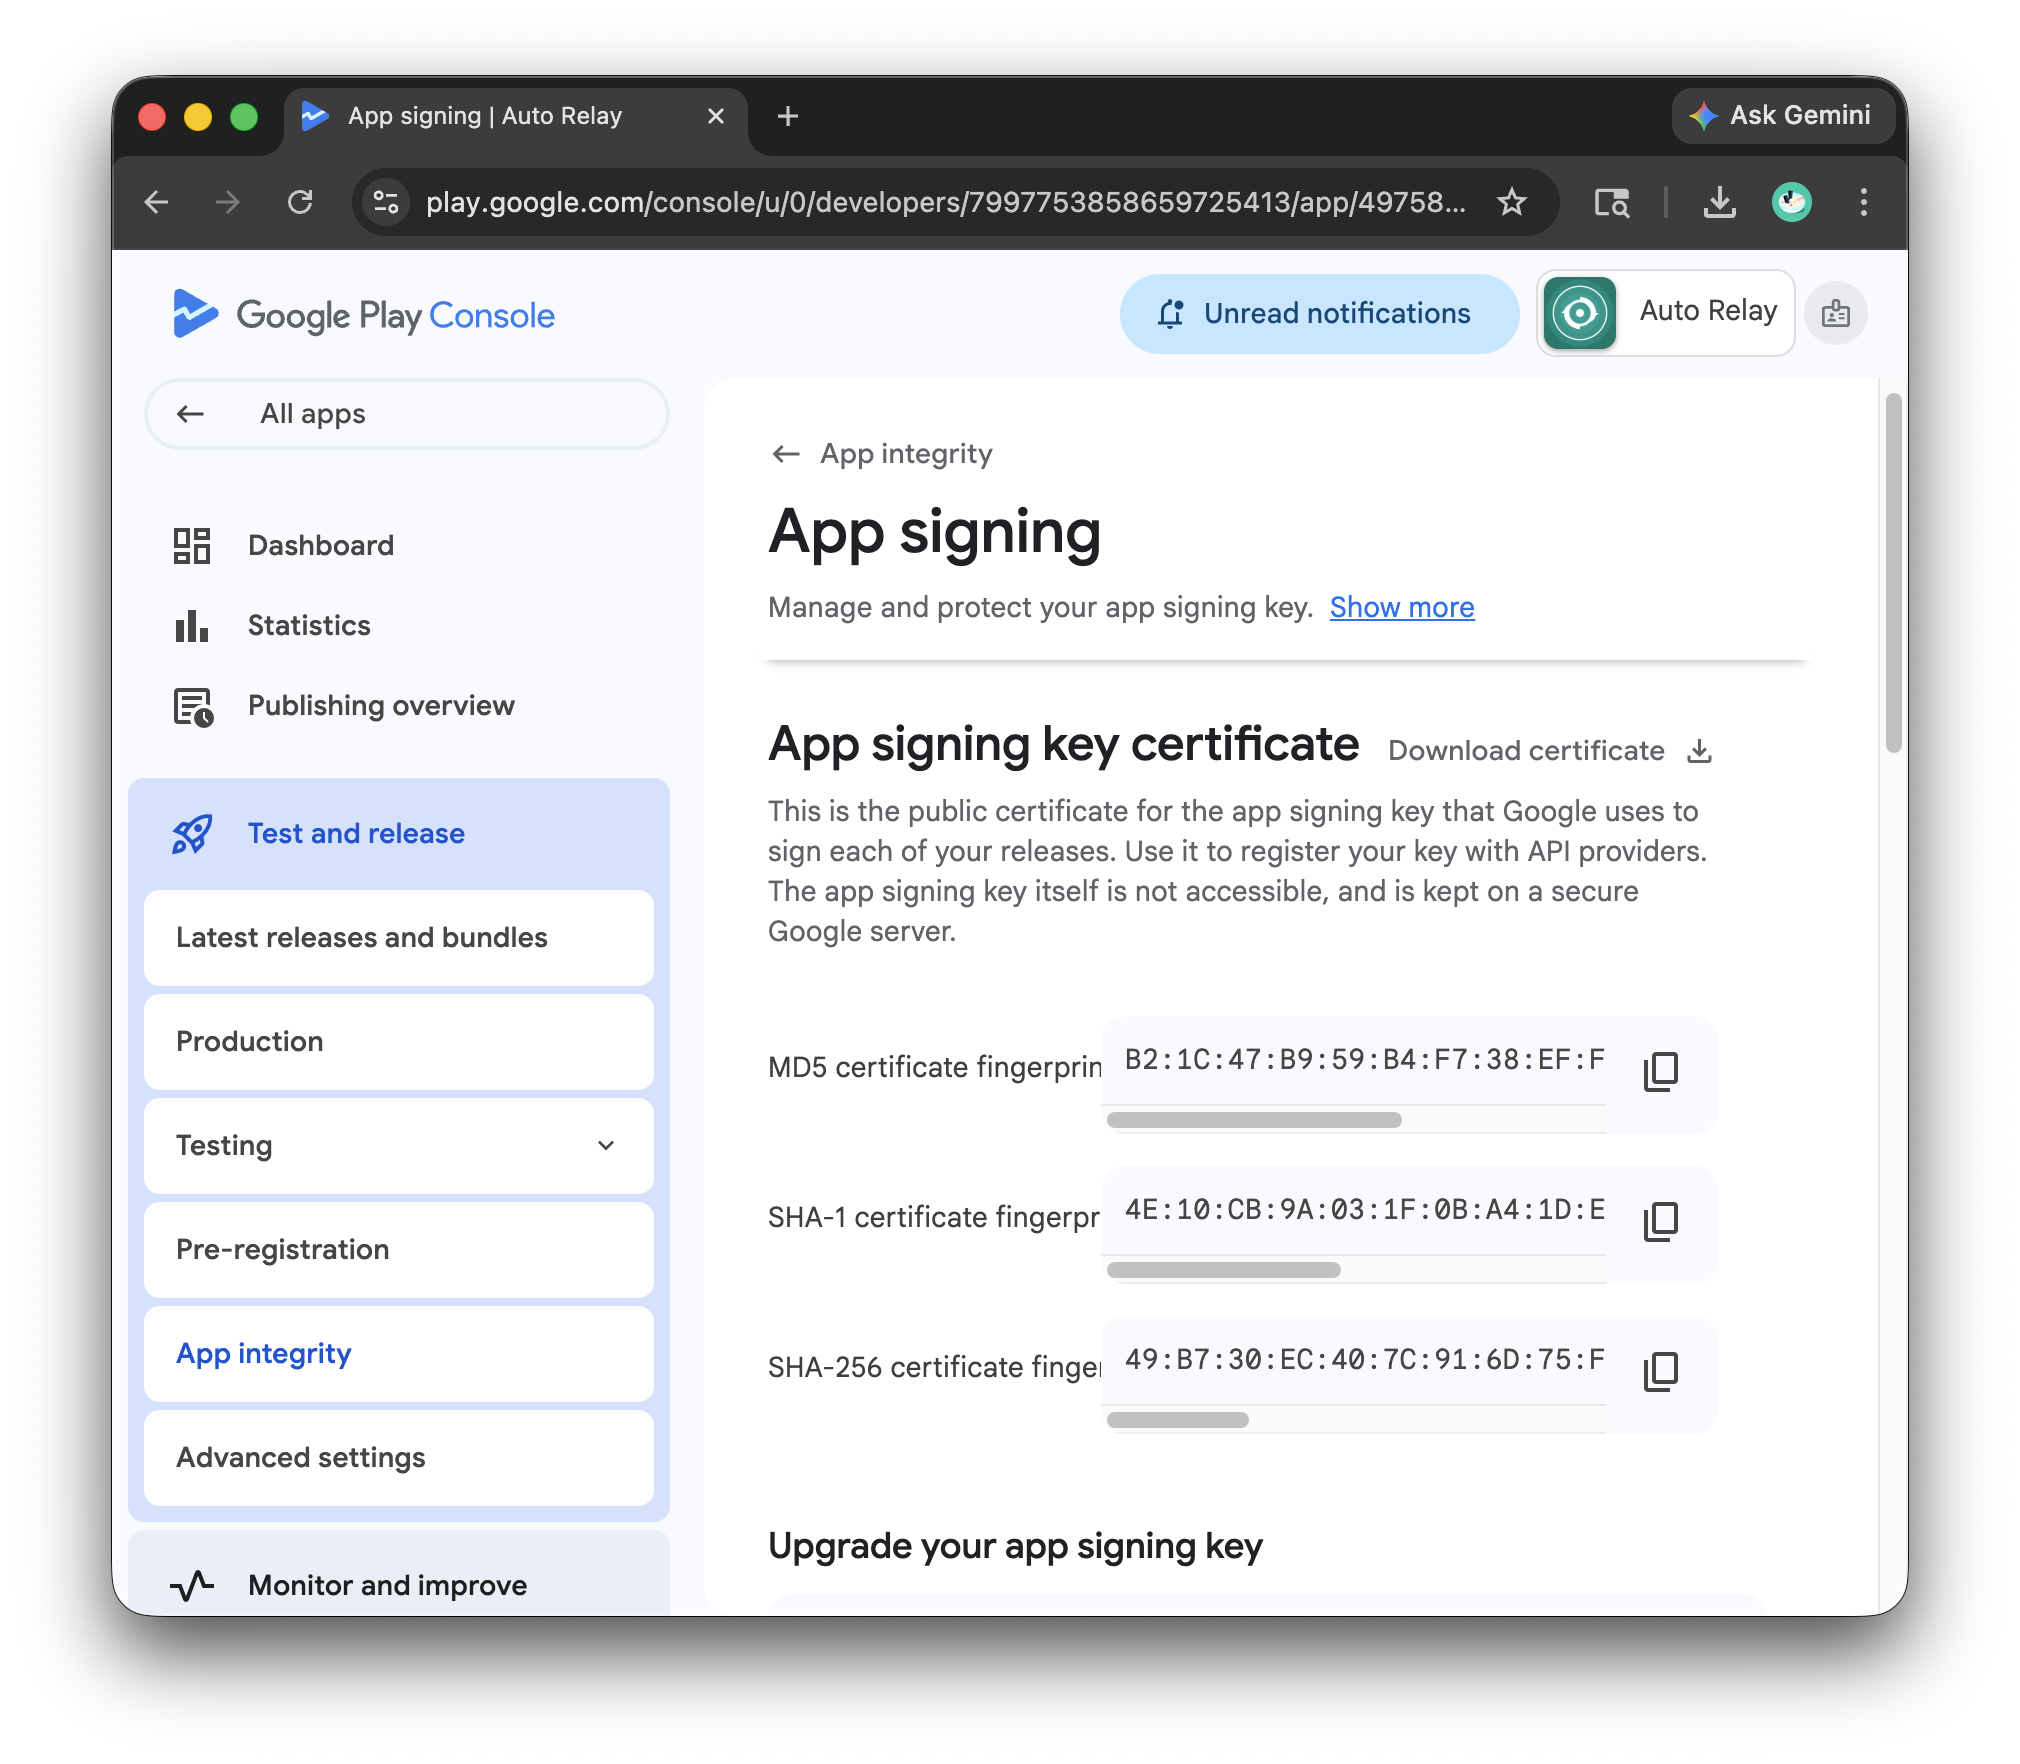
- Add it to your Android OAuth 2.0 client ID in the Google Cloud Console alongside the debug SHA-1
You can have multiple SHA-1s on the same OAuth client, so keep the debug one and add the Play signing one.